
Salt cleaning hacks are about to revolutionize your cleaning routine! Are you tired of spending hours scrubbing away at stubborn stains and grime? Imagine a world where cleaning is not only effective but also surprisingly simple and budget-friendly. This DIY article is your gateway to that world, offering a treasure trove of clever tricks using a common household ingredient: salt.
Salt has been valued for its preserving and cleaning properties for centuries. From ancient civilizations using it to preserve food to its historical use in laundry and sanitation, salt’s versatility is undeniable. Our ancestors understood its power, and now it’s time for us to rediscover it!
In today’s fast-paced world, who has time for endless cleaning? We all crave efficient solutions that save us time and money. That’s where these salt cleaning hacks come in. Whether you’re battling burnt-on food in your pots and pans, struggling with stubborn bathroom stains, or simply looking for a natural and effective way to freshen up your home, these DIY tricks will become your new best friends. I’m excited to share these simple, effective, and eco-friendly solutions that will transform the way you clean!
DIY Salt Cleaning Hacks: Unleash the Power of Sodium Chloride!
Hey there, fellow DIY enthusiasts! I’m always on the lookout for simple, effective, and budget-friendly cleaning solutions. And guess what? Common table salt, that humble kitchen staple, is a surprisingly powerful cleaning agent. Forget harsh chemicals – let’s explore some amazing salt cleaning hacks that will leave your home sparkling!
Cleaning Cast Iron Like a Pro
Cast iron cookware is a treasure, but cleaning it can be a pain. Soap can strip away the seasoning, leading to rust. Salt to the rescue! Its abrasive texture gently scrubs away food particles without damaging the precious seasoning.
What You’ll Need:
* Coarse salt (kosher or sea salt works best)
* A clean, dry cloth or sponge
* A little bit of oil (vegetable, canola, or flaxseed)
Step-by-Step Instructions:
1. Scrape Away Excess Food: After cooking, use a spatula or scraper to remove any large food particles from your cast iron skillet while it’s still warm (but not too hot to handle!).
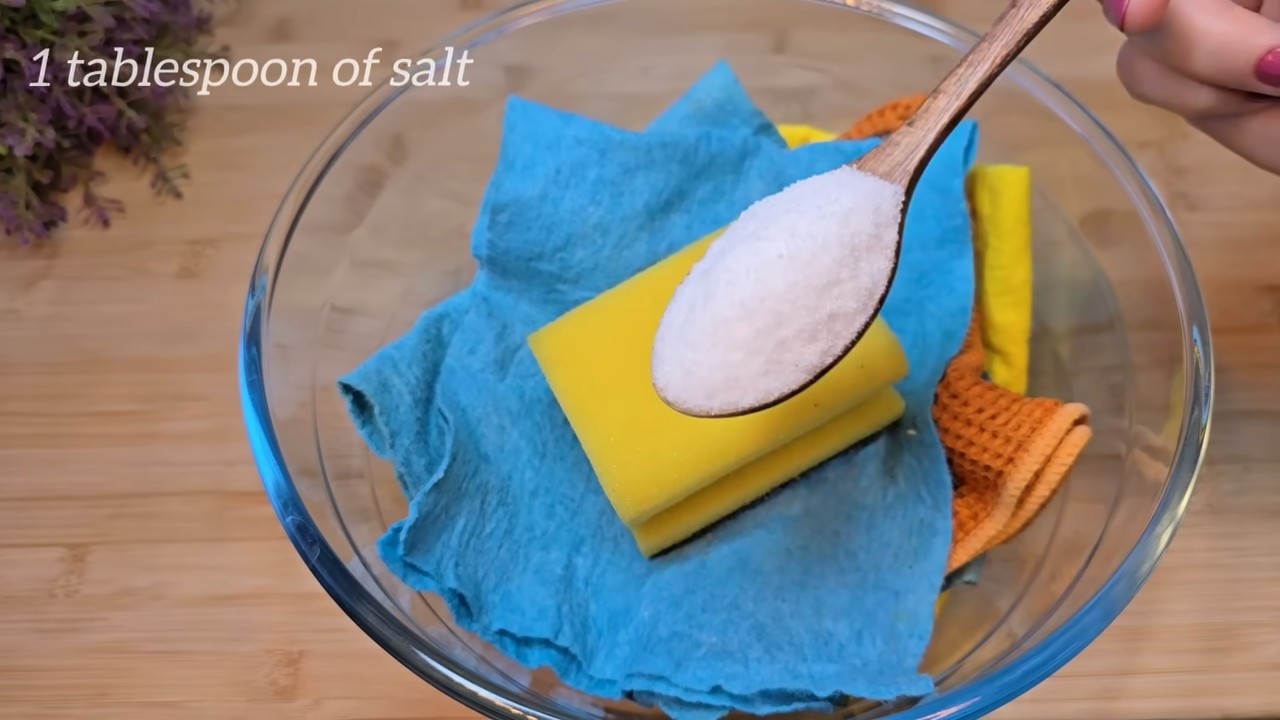
2. Add Salt and Scrub: Pour a generous amount of coarse salt into the skillet. Using your cloth or sponge, scrub the skillet in a circular motion. Apply firm pressure to dislodge any stuck-on food. You’ll see the salt turning brown as it absorbs the grease and grime.
3. Rinse (Optional, but Recommended): If there’s a lot of residue, you can rinse the skillet with hot water. However, avoid using soap! If you do rinse, dry the skillet immediately and thoroughly.
4. Dry Thoroughly: This is crucial to prevent rust. Place the skillet on a burner over low heat for a few minutes to ensure it’s completely dry. You can also use a clean towel to dry it.
5. Season the Skillet: Pour a small amount of oil (about a teaspoon) into the skillet. Use a clean cloth or paper towel to rub the oil all over the inside and outside of the skillet, including the handle. You want a very thin layer of oil – almost like you’re wiping it off.
6. Heat the Skillet: Place the skillet upside down in a preheated oven at 350°F (175°C) for about an hour. This will bake the oil into the pores of the cast iron, creating a protective layer. Place a baking sheet underneath the skillet to catch any drips.
7. Cool and Store: Let the skillet cool completely in the oven before removing it. Your cast iron is now clean, seasoned, and ready for its next culinary adventure!
Reviving Tarnished Copper
Tarnished copper can look dull and lifeless. But don’t despair! A simple salt and vinegar paste can bring back its shine.
What You’ll Need:
* Salt
* White vinegar
* A soft cloth or sponge
* Water
* Optional: Lemon juice
Step-by-Step Instructions:
1. Make the Paste: In a small bowl, mix equal parts salt and white vinegar to form a paste. You can also add a squeeze of lemon juice for extra cleaning power.
2. Apply the Paste: Apply the paste to the tarnished copper surface. Use your cloth or sponge to gently rub the paste in a circular motion.
3. Let it Sit: Allow the paste to sit on the copper for about 15-30 minutes. This gives the salt and vinegar time to break down the tarnish.
4. Rinse Thoroughly: Rinse the copper item thoroughly with water to remove all traces of the paste.
5. Dry and Polish: Dry the copper item with a clean, soft cloth. As you dry it, you’ll notice the shine returning. For extra shine, you can use a copper polishing cloth.
Cleaning Your Iron (Yes, Your Clothes Iron!)
A dirty iron can leave marks on your clothes. Salt can help remove residue and buildup from the soleplate.
What You’ll Need:
* Salt
* A clean cotton cloth or towel
* An iron (unplugged and cool!)
Step-by-Step Instructions:
1. Prepare the Surface: Lay a clean cotton cloth or towel on your ironing board.
2. Sprinkle Salt: Generously sprinkle salt onto the cloth.
3. Iron the Salt: Turn your iron to the highest setting (dry setting, no steam). Carefully iron over the salt-covered cloth for a few minutes. The salt will act as a gentle abrasive, removing residue from the soleplate.
Hey there, fellow DIY enthusiasts! I’m always on the lookout for simple, effective, and budget-friendly cleaning solutions. And guess what? Common table salt, that humble kitchen staple, is a surprisingly powerful cleaning agent. Forget harsh chemicals – let’s explore some amazing salt cleaning hacks that will leave your home sparkling!
Cleaning Cast Iron Like a Pro
Cast iron cookware is a treasure, but cleaning it can be a pain. Soap can strip away the seasoning, leading to rust. Salt to the rescue! Its abrasive texture gently scrubs away food particles without damaging the precious seasoning.
What You’ll Need:
* Coarse salt (kosher or sea salt works best)
* A clean, dry cloth or sponge
* A little bit of oil (vegetable, canola, or flaxseed)
Step-by-Step Instructions:
1. Scrape Away Excess Food: After cooking, use a spatula or scraper to remove any large food particles from your cast iron skillet while it’s still warm (but not too hot to handle!).
2. Add Salt and Scrub: Pour a generous amount of coarse salt into the skillet. Using your cloth or sponge, scrub the skillet in a circular motion. Apply firm pressure to dislodge any stuck-on food. You’ll see the salt turning brown as it absorbs the grease and grime.
3. Rinse (Optional, but Recommended): If there’s a lot of residue, you can rinse the skillet with hot water. However, avoid using soap! If you do rinse, dry the skillet immediately and thoroughly.
4. Dry Thoroughly: This is crucial to prevent rust. Place the skillet on a burner over low heat for a few minutes to ensure it’s completely dry. You can also use a clean towel to dry it.
5. Season the Skillet: Pour a small amount of oil (about a teaspoon) into the skillet. Use a clean cloth or paper towel to rub the oil all over the inside and outside of the skillet, including the handle. You want a very thin layer of oil – almost like you’re wiping it off.
6. Heat the Skillet: Place the skillet upside down in a preheated oven at 350°F (175°C) for about an hour. This will bake the oil into the pores of the cast iron, creating a protective layer. Place a baking sheet underneath the skillet to catch any drips.
7. Cool and Store: Let the skillet cool completely in the oven before removing it. Your cast iron is now clean, seasoned, and ready for its next culinary adventure!
Reviving Tarnished Copper
Tarnished copper can look dull and lifeless. But don’t despair! A simple salt and vinegar paste can bring back its shine.
What You’ll Need:
* Salt
* White vinegar
* A soft cloth or sponge
* Water
* Optional: Lemon juice
Step-by-Step Instructions:
1. Make the Paste: In a small bowl, mix equal parts salt and white vinegar to form a paste. You can also add a squeeze of lemon juice for extra cleaning power.
2. Apply the Paste: Apply the paste to the tarnished copper surface. Use your cloth or sponge to gently rub the paste in a circular motion.
3. Let it Sit: Allow the paste to sit on the copper for about 15-30 minutes. This gives the salt and vinegar time to break down the tarnish.
4. Rinse Thoroughly: Rinse the copper item thoroughly with water to remove all traces of the paste.
5. Dry and Polish: Dry the copper item with a clean, soft cloth. As you dry it, you’ll notice the shine returning. For extra shine, you can use a copper polishing cloth.
Cleaning Your Iron (Yes, Your Clothes Iron!)
A dirty iron can leave marks on your clothes. Salt can help remove residue and buildup from the soleplate.
What You’ll Need:
* Salt
* A clean cotton cloth or towel
* An iron (unplugged and cool!)
Step-by-Step Instructions:
1. Prepare the Surface: Lay a clean cotton cloth or towel on your ironing board.
2. Sprinkle Salt: Generously sprinkle salt onto the cloth.
3. Iron the Salt: Turn your iron to the highest setting (dry setting, no steam). Carefully iron over the salt-covered cloth for a few minutes. The salt will act as a gentle abrasive, removing residue from the soleplate.
4. Wipe Clean: Unplug the iron and let it cool slightly. Use a clean, damp cloth to wipe away any remaining salt and residue from the soleplate.
5. Test the Iron: Before ironing your clothes, test the iron on a scrap piece of fabric to ensure that no salt residue remains.
Freshening Up Your Sink Drain
A smelly sink drain is never pleasant. Salt can help deodorize and unclog minor blockages.
What You’ll Need:
* Salt
* Hot water
Step-by-Step Instructions:
1. Pour Salt Down the Drain: Pour about 1/2 cup of salt down the drain.
2. Flush with Hot Water: Immediately follow with a pot of boiling water.
3. Repeat (If Necessary): Repeat this process a few times a week to keep your drain fresh and clear. The salt helps to break down grease and grime, while the hot water flushes it away.
Removing Water Rings from Wood Furniture
Those pesky water rings on your wood furniture are a common annoyance. Salt and oil can help draw out the moisture and restore the finish.
What You’ll Need:
* Salt
* Vegetable oil or olive oil
* A soft cloth
Step-by-Step Instructions:
1. Make a Paste: Mix equal parts salt and oil to form a paste.
2. Apply the Paste: Gently apply the paste to the water ring.
3. Rub Gently: Using a soft cloth, rub the paste in a circular motion for a few minutes. Be careful not to scratch the finish.
4. Wipe Clean: Wipe away the paste with a clean, damp cloth.
5. Dry and Polish: Dry the area with a clean, soft cloth. You may need to repeat this process a few times for stubborn water rings.
Cleaning Up Egg Spills
Egg spills can be messy and sticky. Salt can help absorb the mess and make it easier to clean up.
What You’ll Need:
* Salt
* A sponge or cloth
Step-by-Step Instructions:
1. Cover the Spill with Salt: Immediately cover the egg spill with a generous amount of salt.
2. Let it Sit: Allow the salt to sit for about 15-20 minutes. The salt will absorb the moisture and congeal the egg, making it easier to scoop up.
3. Scoop Up the Salt: Use a sponge or cloth to scoop up the salt and the congealed egg.
4. Wipe Clean: Wipe the area clean with a damp cloth and soapy water.
Cleaning Artificial Flowers
Artificial flowers can accumulate dust and look dull over time. Salt can help remove the dust and restore their vibrancy.
What You’ll Need:
* Salt
* A paper bag
Step-by-Step Instructions:
1. Place Flowers in a Bag: Place your artificial flowers in a paper bag.
2. Add Salt: Pour a generous amount of salt into the bag.
3. Shake Gently: Hold the bag closed and gently shake it for a few minutes. The salt will act as a gentle abrasive, removing dust and dirt from the flowers.
4. Remove Flowers: Carefully remove the flowers from the bag and shake off any excess salt.
5. Admire Your Clean Flowers: Your artificial flowers should now be clean and refreshed!
Cleaning Burnt Food from Pots and Pans
Burnt food stuck to the bottom of pots and pans is a common kitchen woe. Salt can help loosen the burnt food and make it easier to scrub away.
What You’ll Need:
* Salt
* Water
* A sponge or scouring pad
Step-by-Step Instructions:
1. Cover the Burnt Food with Salt: Cover the burnt food with a generous layer of salt.
2. Add Water: Add enough water to cover the burnt food.
3. Let it Soak: Let the pot or pan soak for several hours, or even overnight. The salt will help to loosen the burnt food.
4. Scrub Away: After soaking, use a sponge or scouring pad to scrub away the
Conclusion
So, there you have it! This simple yet incredibly effective salt cleaning hack is a game-changer for anyone looking to simplify their cleaning routine and achieve sparkling results without harsh chemicals. We’ve explored how the abrasive nature of salt, combined with its natural disinfecting properties, makes it a powerful ally in tackling a wide range of cleaning challenges around your home. From scrubbing stubborn stains in your kitchen to reviving tarnished silverware, the versatility of salt is truly remarkable.
Why is this DIY trick a must-try? Because it’s economical, eco-friendly, and surprisingly effective. Forget about expensive, store-bought cleaners filled with questionable ingredients. With just a humble box of salt, you can unlock a world of cleaning possibilities and create a healthier, more sustainable living environment. Plus, it’s incredibly satisfying to see the grime and dirt disappear with minimal effort.
But the beauty of this salt cleaning hack lies not only in its simplicity but also in its adaptability. Feel free to experiment with different types of salt – coarse sea salt for heavy-duty scrubbing, fine table salt for delicate surfaces, or even Epsom salt for its added mineral benefits. You can also customize your cleaning solutions by adding other natural ingredients like lemon juice for extra degreasing power, vinegar for its disinfecting properties, or essential oils for a pleasant aroma. For instance, a paste of salt and lemon juice works wonders on brass and copper, while a mixture of salt and vinegar can effectively remove hard water stains from showerheads.
Don’t be afraid to get creative and tailor these salt cleaning hacks to your specific needs and preferences. The possibilities are endless!
We wholeheartedly encourage you to give these salt cleaning hacks a try. You’ll be amazed at how easy and effective they are. And once you’ve experienced the magic of salt cleaning for yourself, we’d love to hear about your results! Share your tips, tricks, and before-and-after photos in the comments below. Let’s build a community of salt cleaning enthusiasts and inspire others to embrace this simple, sustainable, and surprisingly powerful cleaning solution. Together, we can transform our homes into sparkling sanctuaries, one grain of salt at a time. So, ditch the harsh chemicals and embrace the power of salt – your home (and your wallet) will thank you for it!
Frequently Asked Questions (FAQs)
Is salt safe to use on all surfaces?
Not necessarily. While salt is generally safe for many surfaces, it’s crucial to exercise caution and test it in an inconspicuous area first, especially on delicate materials like polished wood, certain types of plastic, or painted surfaces. The abrasive nature of salt can potentially scratch or damage these surfaces. For instance, using coarse salt on a delicate glass stovetop could lead to scratches. Always start with a small amount of salt and gentle pressure, and if you notice any signs of damage, discontinue use immediately. For sensitive surfaces, consider using a finer grain of salt or diluting it with water to create a less abrasive solution. When in doubt, consult the manufacturer’s instructions for the specific surface you’re cleaning.
What types of salt are best for cleaning?
The best type of salt for cleaning depends on the specific task at hand. Coarse sea salt is ideal for heavy-duty scrubbing, such as removing stubborn stains from pots and pans or cleaning grout. Its larger granules provide extra abrasion to break down dirt and grime. Fine table salt is a good all-purpose option for general cleaning tasks and is less likely to scratch delicate surfaces. Epsom salt, with its added mineral benefits, can be used for cleaning and deodorizing drains or even as a gentle abrasive for polishing silverware. Ultimately, the choice is yours, but consider the surface you’re cleaning and the level of abrasion required when selecting the type of salt to use.
Can salt be used to clean drains?
Yes, salt can be an effective and eco-friendly way to clean and deodorize drains. Pouring a cup of salt down the drain, followed by hot water, can help to break down grease and grime buildup. For a more powerful cleaning solution, combine salt with baking soda and vinegar. First, pour a cup of baking soda down the drain, followed by a cup of salt. Then, slowly pour in a cup of vinegar. Let the mixture fizz for about 30 minutes, then flush with hot water. This combination helps to loosen clogs and eliminate odors. Regular use of this method can help to prevent drain blockages and keep your drains smelling fresh.
How do I remove salt residue after cleaning?
Removing salt residue is usually quite simple. After cleaning with salt, thoroughly rinse the surface with clean water to remove any remaining salt particles. For larger surfaces, you can use a damp cloth or sponge to wipe away the residue. If the salt residue is particularly stubborn, you can add a small amount of vinegar to the water to help dissolve it. Be sure to dry the surface thoroughly after rinsing to prevent water spots or mineral buildup.
Are there any surfaces I should avoid cleaning with salt?
Yes, there are certain surfaces that you should avoid cleaning with salt due to its abrasive nature. These include:
* Polished wood: Salt can scratch or dull the finish of polished wood furniture or floors.
* Certain plastics: Some types of plastic are easily scratched by salt.
* Painted surfaces: Salt can damage or remove paint from walls or furniture.
* Delicate glass: While salt can be used on some glass surfaces, it’s best to avoid using it on delicate or antique glass items.
* Gold-plated items: Salt can tarnish or damage gold plating.
Always test salt in an inconspicuous area before using it on any surface, and if you’re unsure, it’s best to err on the side of caution and use a different cleaning method.
Can I mix salt with other cleaning agents?
Yes, salt can be effectively combined with other natural cleaning agents to enhance its cleaning power. As mentioned earlier, lemon juice, vinegar, and baking soda are excellent additions to salt cleaning solutions. Lemon juice adds degreasing power and a fresh scent, while vinegar provides disinfecting properties and helps to dissolve hard water stains. Baking soda acts as a gentle abrasive and deodorizer. When combining salt with other cleaning agents, be sure to use appropriate ratios and test the mixture in an inconspicuous area first to ensure it doesn’t damage the surface you’re cleaning. Avoid mixing salt with harsh chemicals like bleach, as this can create dangerous fumes.
How often should I use salt cleaning hacks?
The frequency of using salt cleaning hacks depends on your individual needs and the specific area you’re cleaning. For high-traffic areas or surfaces that are prone to dirt and grime buildup, such as kitchen countertops or bathroom tiles, you may want to use salt cleaning hacks on a weekly basis. For less frequently used areas or surfaces, such as silverware or drains, you can use salt cleaning hacks as needed. Regular use of salt cleaning hacks can help to prevent dirt and grime from accumulating and make your cleaning routine easier in the long run.
What are some other creative uses for salt in cleaning?
Beyond the examples already mentioned, salt has a surprising number of other creative uses in cleaning:
* Cleaning cast iron skillets: Use coarse salt to scrub away food residue from cast iron skillets without damaging the seasoning.
* Removing mildew from fabrics: Soak mildewed fabrics in a solution of salt and water before washing.
* Cleaning coffee and tea stains from mugs: Scrub the inside of stained mugs with salt and water.
* Freshening up sponges: Soak sponges in a solution of salt and water to kill bacteria and remove odors.
* Cleaning artificial flowers: Place artificial flowers in a bag with salt and shake gently to remove dust and dirt.
These are just a few examples of the many creative ways you can use salt to clean your home. With a little experimentation, you’ll discover even more uses for this versatile and affordable cleaning agent.


Leave a Comment