
Scrub Daddy Cleaning Tricks: Who knew that a smiley-faced sponge could be your secret weapon to a sparkling clean home? I’m always on the lookout for clever and efficient ways to tackle household chores, and let me tell you, the Scrub Daddy has completely revolutionized my cleaning routine. Forget spending hours scrubbing away at stubborn messes; with these simple yet effective tricks, you’ll be amazed at how quickly and easily you can achieve a spotless finish.
While the Scrub Daddy might seem like a relatively new invention, the concept of using abrasive materials for cleaning has been around for centuries. From ancient civilizations using sand and natural fibers to modern-day scouring pads, we’ve always sought ways to make cleaning easier. But the Scrub Daddy’s unique FlexTexture material, which changes texture based on water temperature, sets it apart. It’s firm in cold water for tough scrubbing and soft in warm water for gentle cleaning, making it incredibly versatile.
Let’s face it, cleaning isn’t anyone’s favorite activity. But with the right tools and techniques, it can be less of a chore and more of a satisfying accomplishment. That’s where these Scrub Daddy cleaning tricks come in. I’m going to share my favorite hacks for using this amazing sponge to tackle everything from greasy stovetops to grimy bathroom tiles. Get ready to discover how to make your Scrub Daddy work even harder for you and achieve a cleaner, happier home!

Unlock the Scrub Daddy’s Full Potential: Clever Cleaning Hacks You Need to Know!
Hey there, fellow cleaning enthusiasts! I’m so excited to share some amazing Scrub Daddy hacks that have completely revolutionized my cleaning routine. This little smiley-faced sponge is already a powerhouse, but with these tricks, you’ll be amazed at what it can do. Get ready to ditch those harsh chemicals and embrace the power of the Scrub Daddy!
Tackling Tough Kitchen Stains
The kitchen is often the battlefield of grime and grease. But fear not, the Scrub Daddy is here to conquer!
1. Prepping Your Scrub Daddy: First things first, run your Scrub Daddy under warm water. This will make it soft and pliable, perfect for delicate surfaces. For tougher scrubbing, use cold water to keep it firm. I usually start with warm water and adjust as needed.
2. Degreasing Your Stovetop: Stovetops can get incredibly greasy, especially around the burners. I like to sprinkle baking soda over the greasy areas. Then, dampen my Scrub Daddy and gently scrub in a circular motion. The baking soda acts as a mild abrasive, helping to lift the grease without scratching. Rinse thoroughly with clean water. For really stubborn grease, I sometimes make a paste of baking soda and a little dish soap.
3. Cleaning Burnt Food from Pots and Pans: We’ve all been there – that moment when you realize you’ve left something on the stove for too long. Don’t panic! Fill the pot or pan with water and add a tablespoon of baking soda and a squirt of dish soap. Bring it to a boil, then let it simmer for about 15 minutes. After it cools slightly, use your Scrub Daddy to scrub away the burnt food. The warm water and baking soda will have loosened the debris, making it much easier to remove. If it’s still stuck, let it soak longer.
4. Reviving Greasy Oven Racks: Oven racks are notorious for accumulating baked-on grease. I find the easiest way to clean them is in the bathtub (yes, you read that right!). Lay down an old towel to protect the tub, then place the racks inside. Sprinkle generously with baking soda, then pour in hot water until the racks are submerged. Add a cup of dish soap and let it soak overnight. The next day, use your Scrub Daddy to scrub away the loosened grease. Rinse thoroughly and let them dry completely before putting them back in the oven.
5. Cleaning the Microwave with Ease: Microwaves can get splattered with food and grime quickly. To clean mine, I fill a microwave-safe bowl with water and add a few slices of lemon or a tablespoon of vinegar. Microwave on high for 5 minutes. The steam will loosen the grime. Carefully remove the bowl (it will be hot!) and use your Scrub Daddy to wipe down the interior of the microwave. The lemon or vinegar will help to deodorize and cut through grease.
Bathroom Brilliance with Your Scrub Daddy
The bathroom can be a breeding ground for soap scum and mildew. But with these Scrub Daddy hacks, you’ll have a sparkling clean bathroom in no time!
1. Tackling Soap Scum in the Shower: Soap scum can be a real pain to remove. I’ve found that a mixture of equal parts white vinegar and dish soap works wonders. Spray the mixture onto the shower walls and let it sit for about 15 minutes. Then, use your Scrub Daddy to scrub away the soap scum. Rinse thoroughly with water. For stubborn areas, you might need to repeat the process.
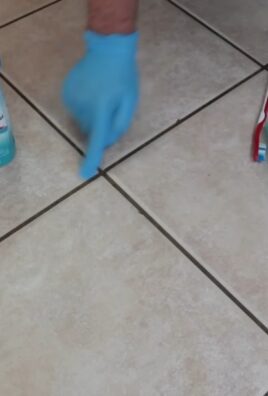
2. Cleaning Grout Lines: Grout lines can get discolored and grimy over time. To clean them, I make a paste of baking soda and water. Apply the paste to the grout lines and let it sit for about 30 minutes. Then, use the edge of your Scrub Daddy to scrub the grout lines. Rinse thoroughly with water. You can also use an old toothbrush for more precise cleaning.
3. Shining Faucets and Fixtures: Faucets and fixtures can easily get water spots and fingerprints. To keep them looking shiny, I use a mixture of water and a few drops of dish soap. Dampen your Scrub Daddy with the mixture and wipe down the faucets and fixtures. Then, dry them with a clean microfiber cloth. This will prevent water spots and keep them looking their best.
4. Cleaning Toilets Effectively: For cleaning the toilet bowl, I like to use a toilet bowl cleaner. Squirt the cleaner around the rim of the bowl and let it sit for a few minutes. Then, use your Scrub Daddy to scrub the bowl, paying attention to any stains or buildup. Flush the toilet to rinse. For the exterior of the toilet, I use a disinfectant spray and wipe it down with my Scrub Daddy.
5. Cleaning Mirrors and Glass Surfaces: To clean mirrors and glass surfaces without streaks, I use a mixture of equal parts white vinegar and water. Spray the mixture onto the surface and wipe it down with your Scrub Daddy. Then, dry it with a clean microfiber cloth. This will leave your mirrors and glass surfaces sparkling clean and streak-free.
Beyond the Kitchen and Bathroom: Unexpected Scrub Daddy Uses
The Scrub Daddy isn’t just for the kitchen and bathroom! Here are some unexpected ways you can use it around your home:
1. Cleaning Car Wheels: Car wheels can get covered in brake dust and grime. I use a dedicated Scrub Daddy (one that I don’t use for anything else!) to clean my car wheels. I spray the wheels with a wheel cleaner and then use the Scrub Daddy to scrub away the dirt and grime. Rinse thoroughly with water.
2. Removing Bugs from Car Windshields: Bugs can be a real nuisance on car windshields. To remove them, I dampen my Scrub Daddy with water and gently scrub the windshield. The texture of the Scrub Daddy helps to lift the bugs without scratching the glass.
3. Cleaning Garden Tools: Garden tools can get covered in dirt and grime. I use my Scrub Daddy to scrub away the dirt and grime from my garden tools. This helps to keep them in good condition and prevents the spread of diseases.
4. Removing Pet Hair from Furniture: Pet hair can be a challenge to remove from furniture. I dampen my Scrub Daddy and use it to wipe down the furniture. The texture of the Scrub Daddy helps to grab the pet hair and lift it from the fabric.
5. Cleaning Shoes: Shoes can get dirty quickly, especially if you wear them outdoors. I use my Scrub Daddy to clean the soles and sides of my shoes. For leather shoes, I use a leather cleaner and conditioner after cleaning them with the Scrub Daddy.
Maintaining Your Scrub Daddy for Longevity
To keep your Scrub Daddy in tip-top shape and extend its lifespan, follow these simple tips:
1. Rinse Thoroughly After Each Use: After each use, rinse your Scrub Daddy thoroughly with water to remove any food particles or cleaning solutions.
2. Squeeze Out Excess Water: Squeeze out as much excess water as possible after rinsing. This will help to prevent the growth of bacteria and mold.
3. Store in a Dry Place: Store your Scrub Daddy in a dry place where it can air dry completely. I like to use the Scrub Daddy Caddy, which allows it to drain properly.
4. Sanitize Regularly: To sanitize your Scrub Daddy, you can microwave it for 1-2 minutes (make sure it’s damp!) or run it through the dishwasher. You can also soak it in a solution of water and bleach (1 tablespoon of bleach per gallon of water) for about 5 minutes. Rinse thoroughly after sanitizing.
5. Replace When Necessary: Even with proper care, your Scrub Daddy will eventually wear out. Replace it when it starts to lose its shape or becomes discolored. I usually replace mine every 2-3 months, depending on how often I use it.
The Scrub Daddy Smile: More Than Just a Pretty Face
Did you know that the Scrub Daddy’s smile isn’t just for show? It’s actually functional! You can use the mouth to clean utensils on both sides at once. It’s also great for cleaning spoons and spatulas. The eyes provide a comfortable grip, making it easier to scrub.
Final Thoughts: Embrace the Scrub Daddy Revolution!
I hope these Scrub Daddy hacks have inspired you to get creative with your cleaning routine. The Scrub Daddy is a versatile and effective cleaning tool that can make your life easier. So, grab your Scrub Daddy, put on some music, and get ready to transform your home into a sparkling clean oasis! Happy cleaning!
Conclusion
So, there you have it! A treasure trove of Scrub Daddy cleaning tricks that will revolutionize your cleaning routine. We’ve explored how this smiley-faced sponge can tackle everything from stubborn stovetop grease to grimy grout, all while maintaining its cheerful disposition. But why is this DIY approach a must-try?
Simply put, these tricks unlock the full potential of your Scrub Daddy. You’re not just using a sponge; you’re wielding a versatile cleaning tool that adapts to your needs. The temperature-controlled FlexTexture allows you to customize the scrubbing power, while the ergonomic design makes even the toughest jobs comfortable. Plus, by incorporating these tips into your cleaning arsenal, you’ll likely find yourself using fewer harsh chemicals, opting instead for the power of steam, vinegar, and good old-fashioned elbow grease, all amplified by the unique properties of the Scrub Daddy.
Beyond the basic techniques, consider these variations to tailor the Scrub Daddy’s power to your specific needs:
* **Essential Oil Infusion:** Add a few drops of your favorite essential oil (lemon, tea tree, or lavender are great choices) to your Scrub Daddy before cleaning for a fresh, aromatic experience. This is especially effective in bathrooms and kitchens.
* **Baking Soda Boost:** For extra-stubborn stains, create a paste of baking soda and water and apply it to the affected area. Then, use your Scrub Daddy to gently scrub away the grime. The abrasive nature of baking soda, combined with the Scrub Daddy’s texture, is a powerful cleaning duo.
* **Dish Soap Power-Up:** Experiment with different dish soaps to find the perfect combination for your cleaning needs. Some soaps are better at cutting grease, while others excel at removing food particles. The Scrub Daddy will help you get the most out of your chosen soap.
* **Targeted Cleaning:** Use the Scrub Daddy’s eyes and mouth to reach tight spaces and corners. The eyes are perfect for cleaning around faucet bases, while the mouth can be used to scrub utensils or clean the inside of glasses.
We’ve shown you how to clean your microwave with steam and your Scrub Daddy, how to clean your oven with baking soda and your Scrub Daddy, and how to clean your grout with vinegar and your Scrub Daddy. These are just a few examples of the many ways you can use this amazing sponge to make your life easier.
But the real magic happens when you start experimenting and discovering your own Scrub Daddy cleaning tricks. Don’t be afraid to get creative and find new ways to utilize its unique properties.
We wholeheartedly encourage you to try these DIY tricks and experience the difference for yourself. You’ll be amazed at how much easier and more effective your cleaning routine becomes. And most importantly, we want to hear about your experiences! Share your own Scrub Daddy cleaning hacks, tips, and tricks in the comments below. Let’s build a community of Scrub Daddy enthusiasts and help each other keep our homes sparkling clean! Let us know what you think of these **Scrub Daddy cleaning tricks**.
Frequently Asked Questions
How do I keep my Scrub Daddy clean and sanitary?
Maintaining a clean and sanitary Scrub Daddy is crucial for effective cleaning and preventing the spread of germs. Fortunately, it’s quite simple! After each use, thoroughly rinse your Scrub Daddy under running water to remove any food particles or debris. Squeeze out excess water and allow it to air dry in a well-ventilated area.
For a deeper clean, you can microwave your Scrub Daddy for approximately one minute. Ensure it’s damp before microwaving to prevent it from melting or catching fire. Alternatively, you can place it in the top rack of your dishwasher for a thorough cleaning. Another effective method is to soak it in a solution of water and white vinegar for about 30 minutes. This will help to disinfect the sponge and remove any lingering odors. Regularly cleaning your Scrub Daddy will extend its lifespan and ensure it remains a hygienic cleaning tool.
Can I use my Scrub Daddy on all surfaces?
While the Scrub Daddy is generally safe for most surfaces, it’s always a good idea to test it in an inconspicuous area first, especially on delicate or easily scratched materials. The FlexTexture material is designed to be gentle when warm and more abrasive when cold, so consider the temperature of the water you’re using. Avoid using the Scrub Daddy on surfaces that are known to scratch easily, such as polished wood, delicate plastics, or certain types of painted surfaces. For these surfaces, a softer sponge or cloth is recommended. When in doubt, err on the side of caution and test before you scrub!
How long does a Scrub Daddy typically last?
The lifespan of a Scrub Daddy depends on several factors, including the frequency of use, the types of surfaces you’re cleaning, and how well you maintain it. With proper care, a Scrub Daddy can typically last for several weeks or even a few months. Signs that it’s time to replace your Scrub Daddy include significant wear and tear, such as tearing or crumbling, a persistent odor that doesn’t go away after cleaning, or a noticeable decrease in its scrubbing power. Regularly cleaning your Scrub Daddy, as mentioned earlier, will help to extend its lifespan.
What is the best way to store my Scrub Daddy?
Proper storage is essential for keeping your Scrub Daddy clean and preventing the growth of bacteria. After each use, thoroughly rinse the sponge and squeeze out excess water. Store it in a well-ventilated area where it can air dry completely. Avoid leaving it in a damp sink or container, as this can promote the growth of mold and mildew. Consider using a sponge holder or caddy that allows for proper air circulation. Some Scrub Daddy models even come with a built-in suction cup for easy storage on smooth surfaces.
Can I use my Scrub Daddy with bleach?
While you can technically use a Scrub Daddy with bleach, it’s generally not recommended. Bleach can degrade the FlexTexture material over time, shortening the lifespan of the sponge. Additionally, bleach can be harsh on your skin and may release harmful fumes when mixed with other cleaning products. If you choose to use bleach, be sure to wear gloves and work in a well-ventilated area. Rinse the Scrub Daddy thoroughly after use to remove any residual bleach. For most cleaning tasks, there are safer and more effective alternatives to bleach, such as vinegar, baking soda, or dish soap.
Is the Scrub Daddy dishwasher safe?
Yes, the Scrub Daddy is dishwasher safe! Placing it in the top rack of your dishwasher is a convenient way to thoroughly clean and sanitize it. The high heat and detergent will help to remove any lingering food particles, grease, or bacteria. Just be sure to remove it from the dishwasher promptly after the cycle is complete to allow it to air dry completely. Regularly cleaning your Scrub Daddy in the dishwasher will help to extend its lifespan and keep it fresh.
Does the Scrub Daddy scratch non-stick cookware?
The Scrub Daddy is generally safe for use on non-stick cookware, but it’s important to exercise caution. When warm or wet with warm water, the FlexTexture material becomes softer and less abrasive, making it suitable for delicate surfaces. However, when cold, it becomes firmer and more abrasive. To avoid scratching your non-stick cookware, use warm water and gentle pressure when cleaning. Avoid using the Scrub Daddy on non-stick surfaces when it’s cold or dry. If you’re concerned about scratching, test it in an inconspicuous area first.
Where can I buy a Scrub Daddy?
Scrub Daddies are widely available at most major retailers, including grocery stores, department stores, and home improvement stores. You can also purchase them online from various e-commerce websites, such as Amazon, Walmart, and Target. Check for sales and promotions to get the best deal.

Leave a Comment