
Tomato bottle gardening: Ever dreamt of harvesting juicy, sun-ripened tomatoes right outside your kitchen window, even if you don’t have a sprawling garden? I know I have! The good news is, you absolutely can, and it’s easier (and more eco-friendly) than you might think. Forget expensive gardening equipment and acres of land; we’re diving into the wonderful world of upcycling and creating thriving tomato plants using something you probably already have in your recycling bin: plastic bottles!
The concept of container gardening, a close relative to our tomato bottle gardening adventure, has been around for centuries. From the hanging gardens of Babylon to the humble window boxes of Victorian England, people have always found creative ways to cultivate plants in limited spaces. But what makes this DIY project so special is its commitment to sustainability. We’re not just growing delicious tomatoes; we’re reducing waste and giving new life to discarded plastic.
In today’s world, where space is a premium and environmental consciousness is growing, this DIY trick is more relevant than ever. Imagine the satisfaction of nurturing a plant from seedling to harvest, knowing you’ve contributed to a greener planet while enjoying the freshest, most flavorful tomatoes imaginable. Plus, it’s a fantastic project for families, teaching children about the life cycle of plants and the importance of recycling. So, grab your scissors, gather your bottles, and let’s get started on this exciting journey to create your very own tomato bottle garden!
DIY Tomato Bottle Gardening: A Thrifty and Eco-Friendly Guide
Hey there, fellow gardening enthusiasts! Are you itching to grow your own juicy tomatoes but short on space or resources? Well, I’ve got the perfect solution for you: tomato bottle gardening! It’s a fantastic way to recycle those plastic bottles piling up and transform them into mini-tomato havens. Trust me, it’s easier than you think, and the results are incredibly rewarding. Let’s dive in!
What You’ll Need:
Before we get our hands dirty, let’s gather our supplies. Here’s a list of everything you’ll need to create your own tomato bottle garden:
* Plastic Bottles: The star of the show! Look for sturdy plastic bottles, preferably 2-liter soda bottles or larger. Clear or slightly tinted bottles work best. The number of bottles you’ll need depends on how many tomato plants you want to grow.
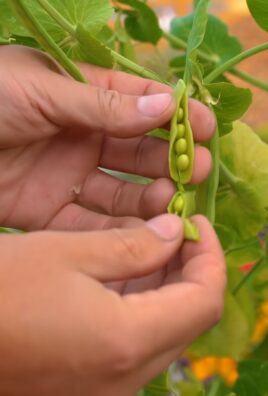
* Tomato Seedlings: You can either start your own tomato seeds indoors or purchase seedlings from a local nursery. Choose a variety that suits your climate and space. Determinate (bush) varieties are often a good choice for container gardening.
* Potting Mix: A high-quality potting mix is crucial for healthy tomato growth. Avoid using garden soil, as it can compact and hinder drainage.
* Scissors or Utility Knife: For cutting the plastic bottles. Be careful!
* Drill or Nail and Hammer: To create drainage holes.
* Twine or Rope: For hanging the bottles (optional).
* Water: Of course!
* Fertilizer: A balanced liquid fertilizer to feed your tomato plants.
* Gloves: To keep your hands clean and protected.
* Measuring Cup or Spoon: For accurate fertilizer application.
* Small Pebbles or Gravel: To improve drainage at the bottom of the bottles.
* Optional: Paint or markers to decorate your bottles!
Preparing the Bottles:
Okay, let’s get those bottles ready for their new life as tomato planters!
1. Clean the Bottles: Thoroughly wash the plastic bottles with soap and water to remove any residue. Rinse them well and let them dry completely. This is important to prevent any contamination that could harm your plants.
2. Cut the Bottles: This is where the scissors or utility knife comes in. There are a couple of ways you can cut the bottles, depending on whether you want a hanging planter or a freestanding one.
* For Hanging Planters: Cut the bottle in half horizontally. You’ll be using the bottom half as the planter and the top half as a funnel/watering reservoir (more on that later).
* For Freestanding Planters: Cut off the top third of the bottle. You’ll discard the top portion.
Safety First! Be extremely careful when using sharp tools. If you’re using a utility knife, make sure to use a cutting board and keep your fingers away from the blade.
3. Create Drainage Holes: Drainage is essential to prevent root rot. Use a drill or a nail and hammer to create several drainage holes in the bottom of the bottle. I usually make about 4-6 holes, depending on the size of the bottle.
4. Optional: Decorate the Bottles: This is where you can get creative! Use paint, markers, or even decoupage to decorate your bottles. Just make sure to use non-toxic materials that won’t harm your plants. Let the paint dry completely before moving on to the next step.
Planting Your Tomato Seedlings:
Now for the fun part – planting those little tomato babies!
1. Add Drainage Layer: Place a layer of small pebbles or gravel at the bottom of the bottle. This will further improve drainage and prevent the potting mix from clogging the drainage holes.
2. Fill with Potting Mix: Fill the bottle with high-quality potting mix, leaving about an inch or two of space at the top. Gently pat down the soil to remove any air pockets.
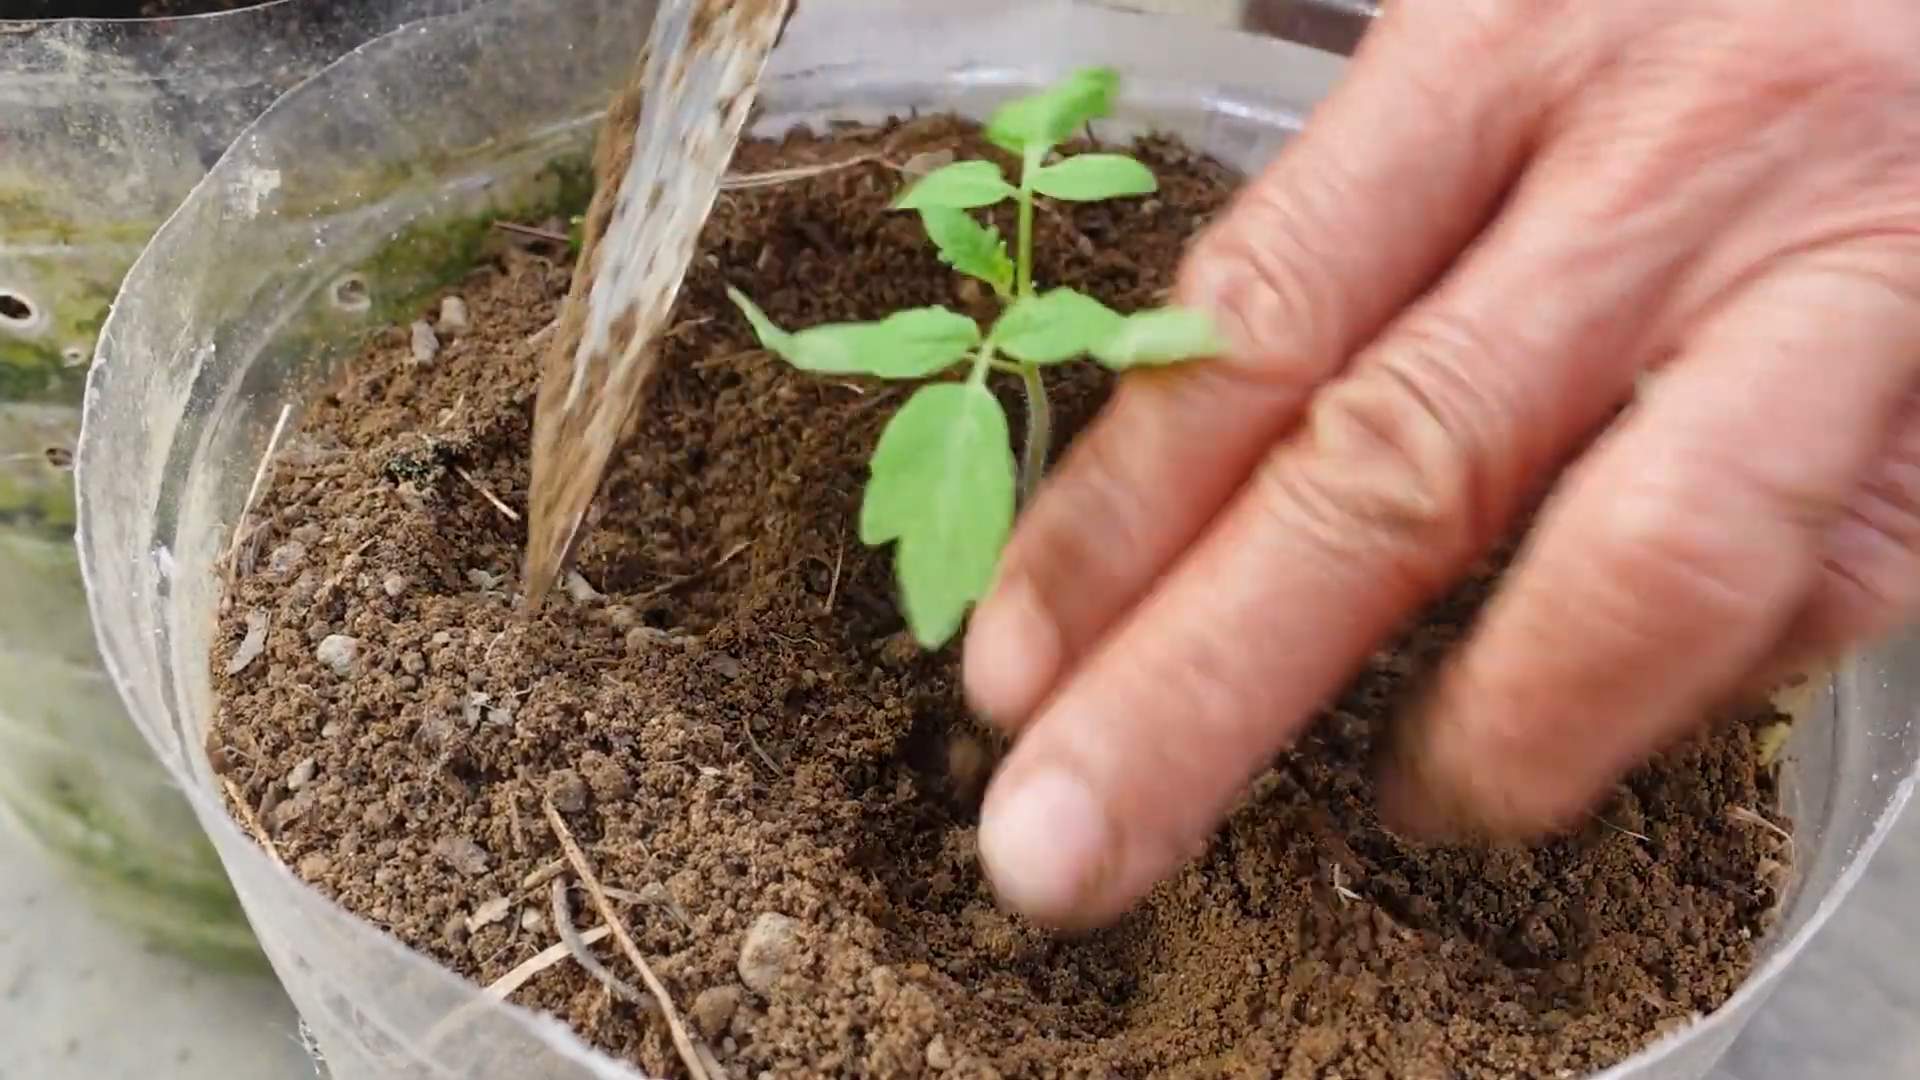
3. Plant the Seedling: Carefully remove the tomato seedling from its container. Gently loosen the roots with your fingers. Dig a small hole in the potting mix and place the seedling in the hole. Make sure the top of the root ball is level with the surface of the soil.
4. Backfill and Water: Fill the hole with potting mix and gently pat it down around the seedling. Water thoroughly until the water drains out of the drainage holes.
For Hanging Planters (Using the Top Half as a Watering Reservoir):
If you opted for the hanging planter method, here’s how to use the top half of the bottle as a self-watering system:
1. Invert the Top Half: Invert the top half of the bottle and place it inside the bottom half, with the bottle cap facing down.
2. Create a Wick (Optional): You can insert a piece of cotton rope or fabric through the bottle cap hole to act as a wick. This will help draw water from the reservoir to the soil.
3. Fill the Reservoir: Fill the top half of the bottle with water. The water will slowly seep into the soil, keeping it consistently moist.
4. Hanging: Use twine or rope to create a hanger for your bottle. Make sure the hanger is strong enough to support the weight of the bottle, soil, and plant. Hang the bottle in a sunny location.
Caring for Your Tomato Plants:
Congratulations! You’ve successfully planted your tomato seedlings in recycled bottles. Now, let’s make sure they thrive!
1. Sunlight: Tomato plants need at least 6-8 hours of sunlight per day. Place your bottle gardens in a sunny location, such as a balcony, patio, or windowsill.
2. Watering: Water your tomato plants regularly, especially during hot weather. Check the soil moisture by sticking your finger into the soil. If the top inch of soil feels dry, it’s time to water. Avoid overwatering, as this can lead to root rot. If you’re using the self-watering method, simply refill the reservoir when it’s empty.
3. Fertilizing: Tomato plants are heavy feeders and need regular fertilization. Use a balanced liquid fertilizer, following the instructions on the label. I usually fertilize my tomato plants every 2-3 weeks.
4. Pruning: Pruning can help improve air circulation and encourage fruit production. Remove any suckers (small shoots that grow between the main stem and the branches) that appear.
5. Support: As your tomato plants grow, they may need support to prevent them from falling over. You can use stakes, cages, or trellises to support the plants.
6. Pest and Disease Control: Keep an eye out for pests and diseases. Common tomato pests include aphids, whiteflies, and tomato hornworms. Common diseases include early blight, late blight, and blossom end rot. Treat any problems promptly with appropriate organic pesticides or fungicides.
7. Pollination: Tomato plants are self-pollinating, but sometimes they need a little help. Gently shake the plants or use a small brush to transfer pollen from one flower to another.
Harvesting Your Tomatoes:
The moment you’ve been waiting for! Harvesting your own homegrown tomatoes is one of the most rewarding experiences.
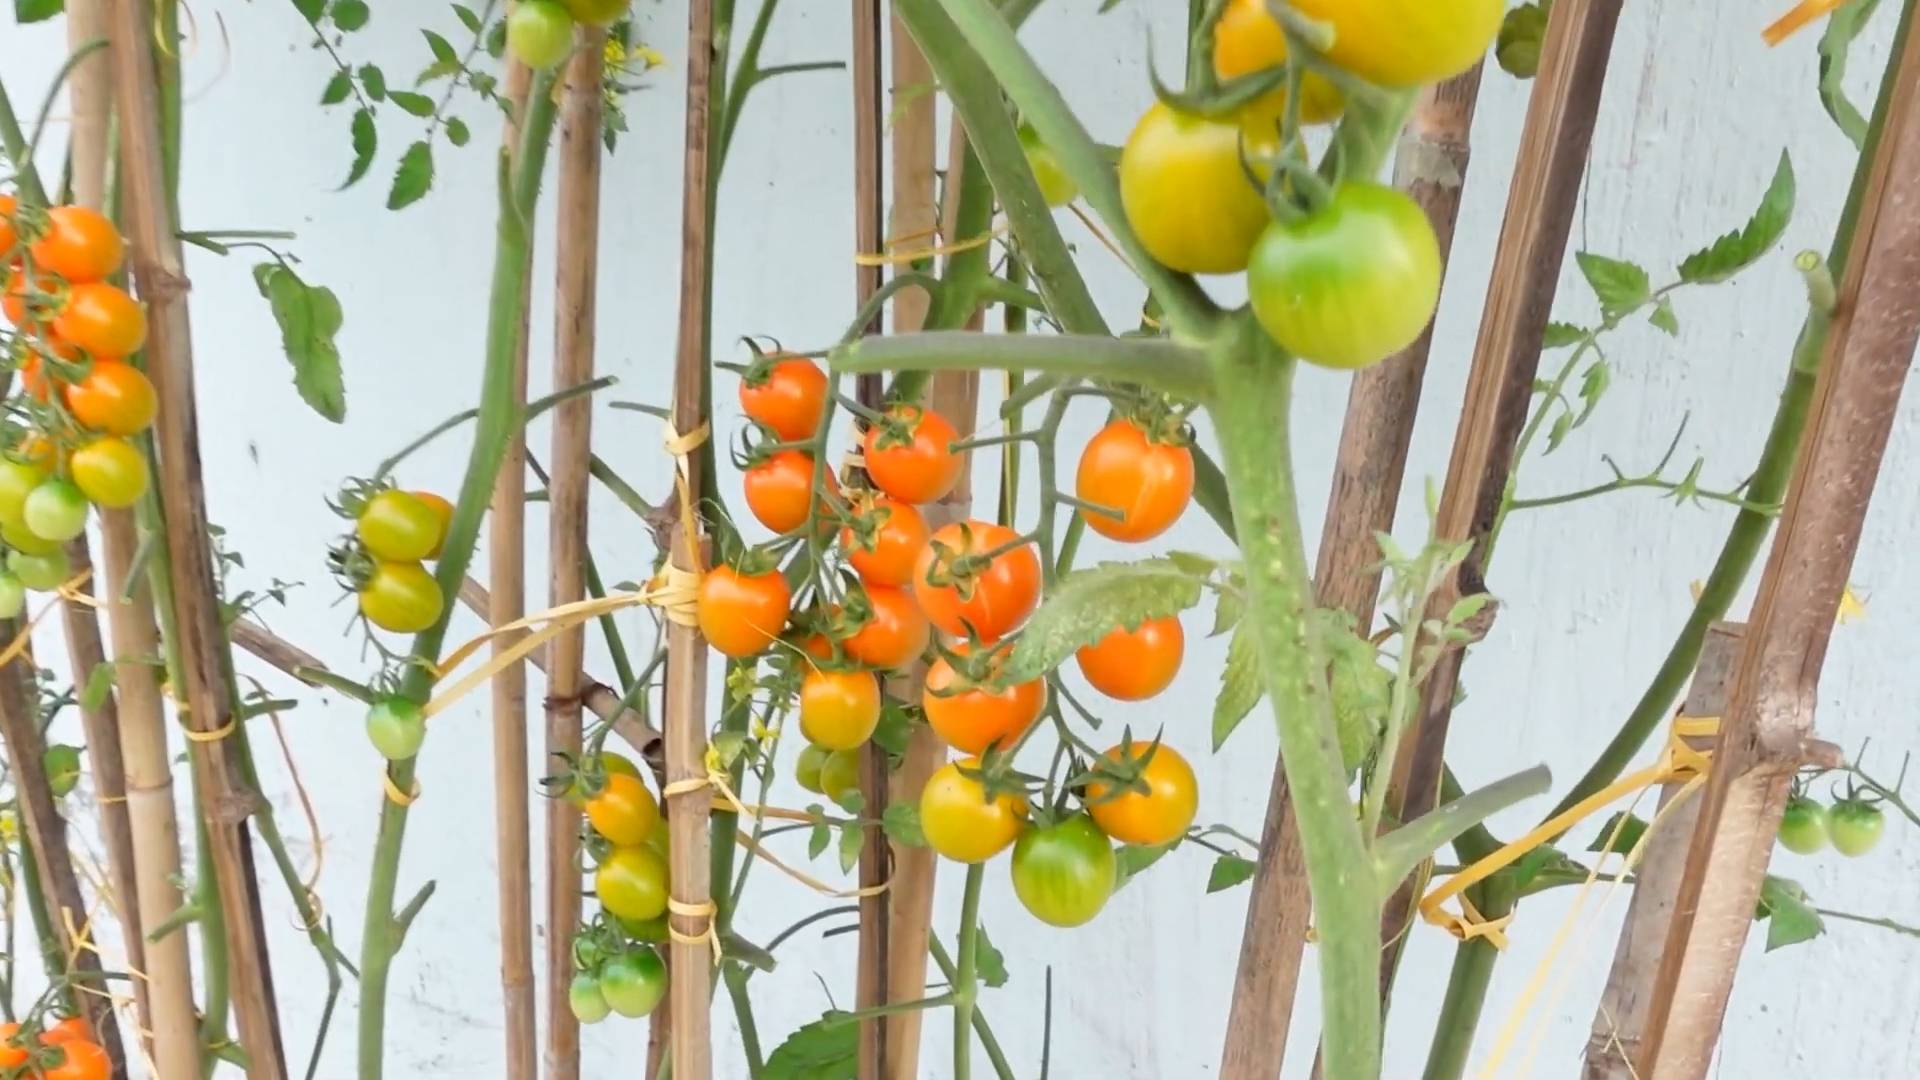
1. Ripeness: Tomatoes are ready to harvest when they are fully colored and slightly soft to the touch.
2. Harvesting: Gently twist or cut the tomato from the vine.
3. Enjoy! Enjoy your delicious, homegrown tomatoes in salads, sandwiches, sauces, or simply eat them fresh off the vine.
Troubleshooting:
Even with the best care, you might encounter some challenges along the way. Here are a few common problems and how to fix them:
* Yellowing Leaves: This could be a sign of overwatering, underwatering, or nutrient deficiency. Adjust your watering schedule and fertilize your plants regularly.
* Blossom End Rot: This is caused by a calcium deficiency. Add calcium to the soil or use a calcium-rich fertilizer.
* Pests: Treat pests with organic pesticides or insecticidal soap.
* Diseases: Remove any infected leaves or plants to prevent the spread of disease. Use organic fungicides if necessary.
Tips and Tricks:
Here are a few extra tips to help you succeed with tomato bottle gardening:
* Choose the Right Variety: Determinate (bush) tomato varieties are generally better suited for container gardening than indeterminate (vining) varieties.
* Use High-Quality Potting Mix: Don’t skimp on the potting mix. A good quality potting mix will provide the nutrients and drainage that your tomato plants need.
* Water Regularly: Tomato plants need consistent moisture, especially during hot weather.
* Fertilize Regularly: Tomato plants are heavy feeders and need regular fertilization.
* Provide Support: As your tomato plants grow,
Conclusion
So, there you have it! Transforming discarded tomato bottles into thriving mini-gardens is not just a clever upcycling project; it’s a gateway to fresh herbs, vibrant flowers, and a deeper connection with nature, right on your windowsill or balcony. This simple DIY trick offers a multitude of benefits, from reducing waste and saving money to providing a therapeutic and rewarding gardening experience.
Why is this a must-try? Because it’s accessible to everyone, regardless of space or gardening experience. Whether you live in a sprawling suburban home or a compact city apartment, you can participate in the joy of growing your own plants. It’s also incredibly budget-friendly, repurposing materials that would otherwise end up in the landfill. Think of all the money you’ll save on store-bought herbs, not to mention the satisfaction of harvesting your own homegrown produce.
But the advantages extend beyond the practical. Gardening, even on a small scale, has been proven to reduce stress, improve mood, and boost creativity. Nurturing your tomato bottle garden provides a sense of accomplishment and a tangible connection to the natural world. It’s a mindful activity that allows you to slow down, observe the miracle of growth, and appreciate the simple beauty of plants.
Looking for variations? The possibilities are endless! Experiment with different types of plants. Herbs like basil, mint, and chives thrive in these small containers. You can also grow leafy greens like lettuce and spinach, or even try your hand at cultivating miniature tomatoes or peppers. Consider adding decorative elements to your tomato bottle gardens. Paint the bottles with vibrant colors, embellish them with twine or ribbon, or create personalized labels for each plant. You can even group several bottles together to create a stunning vertical garden display.
Another exciting variation is to explore different growing mediums. While potting soil is a reliable choice, you can also experiment with coco coir, perlite, or even a hydroponic setup. Each medium offers unique benefits in terms of water retention, aeration, and nutrient delivery.
Don’t be afraid to get creative and personalize your tomato bottle gardening experience. The most important thing is to have fun and enjoy the process of nurturing your plants.
We wholeheartedly encourage you to give this DIY trick a try. It’s a simple, sustainable, and incredibly rewarding way to bring the beauty and benefits of gardening into your life. Once you’ve created your own tomato bottle garden, we’d love to hear about your experience! Share your photos, tips, and stories with us in the comments below. Let’s inspire each other to embrace the joy of upcycling and gardening, one tomato bottle at a time. We are confident that you will find this a fun and easy way to start your gardening journey.
Frequently Asked Questions (FAQ)
What kind of tomato bottles work best for this project?
Any standard plastic tomato sauce or ketchup bottle will work well. Look for bottles that are relatively sturdy and have a wide mouth for easy planting. Clear or translucent bottles are ideal, as they allow you to monitor the soil moisture levels. Make sure to thoroughly clean the bottles with soap and water before using them to remove any residue.
What kind of soil should I use for my tomato bottle garden?
A good quality potting mix is recommended. Avoid using garden soil, as it can be too dense and may contain pests or diseases. Look for a potting mix that is specifically formulated for container gardening, as it will provide adequate drainage and aeration. You can also amend the potting mix with compost or other organic matter to improve its fertility.
How often should I water my tomato bottle garden?
The frequency of watering will depend on several factors, including the type of plant, the size of the bottle, the temperature, and the humidity. As a general rule, water when the top inch of soil feels dry to the touch. Avoid overwatering, as this can lead to root rot. Make sure the bottle has drainage holes to allow excess water to escape.
What kind of plants can I grow in a tomato bottle garden?
Many different types of plants can thrive in a tomato bottle garden. Herbs like basil, mint, chives, oregano, and thyme are excellent choices. Leafy greens like lettuce, spinach, and kale also do well. You can even grow small vegetables like cherry tomatoes, peppers, and strawberries. When selecting plants, consider the size of the bottle and the amount of sunlight available.
How much sunlight do my tomato bottle plants need?
Most plants need at least six hours of sunlight per day to thrive. Place your tomato bottle garden in a sunny location, such as a windowsill or balcony. If you don’t have access to enough natural light, you can supplement with artificial grow lights.
How do I fertilize my tomato bottle plants?
Container plants need regular fertilization to provide them with the nutrients they need to grow. Use a balanced liquid fertilizer diluted to half strength. Fertilize every two to four weeks, depending on the type of plant and its growth rate.
How do I prevent pests and diseases in my tomato bottle garden?
Regularly inspect your plants for signs of pests or diseases. If you notice any problems, take action immediately. You can use organic pest control methods, such as insecticidal soap or neem oil. Avoid overwatering, as this can create conditions that are favorable to fungal diseases.
How do I transplant my tomato bottle plants?
If your plants outgrow their tomato bottle containers, you can transplant them into larger pots or into the garden. Gently remove the plant from the bottle, being careful not to damage the roots. Plant it in a new container with fresh potting mix. Water thoroughly after transplanting.
Can I grow plants from seeds in a tomato bottle?
Yes, you can absolutely start seeds in a tomato bottle. Just make sure to provide adequate drainage and keep the soil moist until the seedlings emerge. Once the seedlings are large enough, you can transplant them into larger containers or into the garden.
How do I ensure proper drainage in my tomato bottle garden?
Drilling drainage holes in the bottom of the bottle is crucial. You can use a drill or a sharp knife to create several small holes. You can also add a layer of gravel or pebbles to the bottom of the bottle to improve drainage.
What if my tomato bottle garden starts to smell bad?
A foul odor usually indicates overwatering or poor drainage. Check the drainage holes to make sure they are not clogged. Allow the soil to dry out slightly before watering again. You can also add some activated charcoal to the soil to help absorb odors.
Can I use this method for indoor gardening?
Absolutely! Tomato bottle gardening is perfect for indoor gardening, especially if you have limited space. Just make sure to provide adequate light and ventilation.
How do I keep my tomato bottle garden from tipping over?
If your tomato bottle garden is top-heavy, you can add some weight to the bottom of the bottle. You can use pebbles, rocks, or even sand. You can also place the bottle inside a larger, more stable container.
Is tomato bottle gardening environmentally friendly?
Yes, tomato bottle gardening is a very environmentally friendly practice. It reduces waste by repurposing discarded materials, saves water by using small containers, and reduces the need for transportation of store-bought produce. It’s a great way to contribute to a more sustainable lifestyle.
Leave a Comment