
Vinegar spray cleaner recipe: it’s more than just a kitchen staple; it’s your secret weapon for a sparkling clean home, naturally! Are you tired of harsh chemicals and sky-high prices for cleaning products? I know I was! That’s why I dove headfirst into the world of DIY cleaning, and let me tell you, it’s been a game-changer.
For centuries, vinegar has been celebrated for its potent cleaning and disinfecting properties. From ancient civilizations using it to preserve food to our grandmothers relying on it for household chores, vinegar has a rich history as a natural cleaning agent. But in recent years, we’ve strayed away from these time-tested methods, opting for commercially produced cleaners filled with questionable ingredients.
But why should you care about a simple vinegar spray cleaner recipe? Because it’s effective, affordable, eco-friendly, and incredibly versatile! In this article, I’m going to share my go-to recipe for a vinegar spray cleaner that will tackle everything from grimy countertops to streaky windows. Plus, I’ll reveal some clever DIY hacks to customize your cleaner for specific cleaning needs. Get ready to ditch the chemicals and embrace the power of vinegar!
DIY All-Purpose Vinegar Cleaning Spray: A Natural Cleaning Powerhouse
Okay, let’s ditch those harsh chemicals and whip up a fantastic all-purpose cleaning spray using the magic of vinegar! I’ve been using this recipe for years, and it’s seriously a game-changer. It’s cheap, effective, and you probably already have most of the ingredients at home. Plus, it’s way better for the environment and your health.
What You’ll Need: The Essential Supplies
Before we dive in, let’s gather everything we need. This will make the whole process smooth and enjoyable.
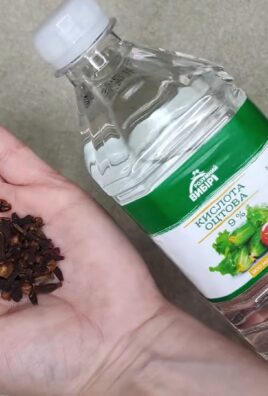
* White Distilled Vinegar: This is the star of the show! Its acidity is what cuts through grease and grime.
* Water: Dilutes the vinegar to make it safe for most surfaces.
* Essential Oils (Optional): Vinegar has a distinct smell, so essential oils are great for adding a pleasant fragrance and boosting cleaning power. I personally love lemon, lavender, tea tree, or eucalyptus.
* Spray Bottle: A clean, empty spray bottle is essential for dispensing your homemade cleaner.
* Measuring Cup or Spoons: For accurate measurements, especially if you’re a stickler for details like me!
* Funnel (Optional): Makes pouring liquids into the spray bottle much easier and less messy.
Step-by-Step Instructions: Creating Your Cleaning Concoction
Alright, let’s get our hands dirty (or clean, in this case!). Follow these steps, and you’ll have a fantastic all-purpose cleaner in no time.
1. Prepare Your Spray Bottle: Make sure your spray bottle is clean and dry. Any residue from previous cleaners could interfere with the effectiveness of your vinegar spray. I usually rinse mine with hot water and let it air dry.
2. Combine Vinegar and Water: This is where the magic begins! The ratio of vinegar to water is crucial. For an all-purpose cleaner, I recommend a 1:1 ratio. That means equal parts vinegar and water. So, if you’re using a 16-ounce spray bottle, you’ll need 8 ounces of white distilled vinegar and 8 ounces of water. Pour the vinegar into your spray bottle first.
3. Add Water: Now, carefully pour the water into the spray bottle. I like to use a funnel to avoid any spills. Tap water is perfectly fine, but if you have hard water, you might consider using distilled water to prevent mineral buildup in your spray bottle over time.
4. Essential Oil Infusion (Optional): This is where you can customize your cleaner and make it smell amazing! If you’re using essential oils, add about 10-20 drops to the spray bottle. Remember, a little goes a long way! My go-to blend is usually 10 drops of lemon and 5 drops of tea tree oil. Lemon is great for cutting through grease, and tea tree oil has antibacterial properties.
5. Shake it Up: Secure the spray nozzle onto the bottle and give it a good shake to thoroughly mix all the ingredients. This ensures that the essential oils are evenly dispersed throughout the solution.
6. Label Your Bottle: This is super important! You don’t want anyone accidentally using your cleaning spray for something else. Clearly label the bottle as “Vinegar Cleaning Spray” or something similar. You can even add the date you made it.
Using Your Vinegar Cleaning Spray: Tips and Tricks for Sparkling Results
Now that you have your homemade cleaning spray, let’s talk about how to use it effectively.
* Test First: Before spraying on a large surface, always test a small, inconspicuous area to make sure it doesn’t damage or discolor the material. Vinegar can be acidic, so it’s best to be cautious.
* Spray and Wipe: Simply spray the cleaner onto the surface you want to clean and let it sit for a few seconds. Then, wipe it clean with a clean cloth or paper towel. For tougher stains, you might need to let it sit for a minute or two before wiping.
* Tackle Grease and Grime: This spray is fantastic for cutting through grease and grime in the kitchen. Use it on countertops, stovetops, sinks, and even inside the microwave (just be sure to wipe it down thoroughly afterward).
* Clean Bathrooms: Vinegar is also great for cleaning bathrooms. Use it on sinks, toilets, showers, and tiles. It can help remove soap scum and hard water stains.
* Freshen Up Windows and Mirrors: For streak-free windows and mirrors, spray a light mist of your vinegar cleaner and wipe it clean with a microfiber cloth.
* Deodorize: Vinegar is a natural deodorizer. Spray it in the air to freshen up a room or use it to clean smelly surfaces like garbage cans.
* Avoid Certain Surfaces: While vinegar is generally safe, avoid using it on certain surfaces like marble, granite, and other natural stone. The acidity can etch or damage these materials. Also, avoid using it on waxed furniture, as it can strip the wax.
Troubleshooting: Addressing Common Concerns
Sometimes, things don’t go exactly as planned. Here are some common concerns and how to address them.
* Vinegar Smell: The strong smell of vinegar is a common concern. Don’t worry, it dissipates quickly! Adding essential oils can help mask the smell. Also, make sure to ventilate the area well while cleaning.
* Streaking: If you’re experiencing streaking, it could be due to hard water or using too much cleaner. Try using distilled water or diluting the cleaner further. Also, make sure you’re using a clean cloth or microfiber cloth to wipe the surface.
* Residue: If you’re noticing a residue after cleaning, it could be due to soap scum or other buildup on the surface. Try cleaning the surface with a damp cloth first to remove any loose debris before spraying with the vinegar cleaner.
Essential Oil Blends: My Favorite Combinations
Experimenting with essential oil blends is one of my favorite parts of making this cleaner. Here are a few of my go-to combinations:
* Lemon and Tea Tree: This is my all-time favorite! Lemon is great for cutting through grease, and tea tree oil has antibacterial properties. It’s a powerful and refreshing combination.
* Lavender and Eucalyptus: This blend is calming and refreshing. Lavender has a relaxing scent, while eucalyptus has a decongestant effect. It’s perfect for cleaning bathrooms and bedrooms.
* Orange and Clove: This blend is warm and inviting. Orange has a cheerful scent, while clove adds a spicy note. It’s great for cleaning kitchens and living rooms.
* Peppermint and Rosemary: This blend is invigorating and energizing. Peppermint has a cooling effect, while rosemary has a stimulating scent. It’s perfect for cleaning offices and workspaces.
Storage Tips: Keeping Your Cleaner Fresh
To keep your vinegar cleaning spray fresh and effective, store it in a cool, dark place. Avoid storing it in direct sunlight, as this can degrade the essential oils. The cleaner should last for several months. If you notice any changes in color or smell, it’s best to discard it and make a fresh batch.
Safety Precautions: A Few Words of Caution
While vinegar is a natural cleaner, it’s still important to take a few safety precautions.
* Keep Out of Reach of Children and Pets: Like all cleaning products, keep your vinegar cleaning spray out of reach of children and pets.
* Avoid Contact with Eyes: Avoid getting the cleaner in your eyes. If contact occurs, rinse thoroughly with water.
* Don’t Mix with Bleach: Never mix vinegar with bleach, as this can create toxic fumes.
* Ventilate the Area: When cleaning, make sure to ventilate the area well to avoid inhaling too much vinegar vapor.
Why I Love This DIY Cleaner: My Personal Testimony
Honestly, this DIY vinegar cleaning spray has been a game-changer for me. I love knowing exactly what’s in my cleaning products, and I feel good about using something that’s safe for my family and the environment. Plus, it’s so much cheaper than buying commercial cleaners! I’ve used it on everything from countertops to floors to windows, and it always delivers amazing results. I highly recommend giving it a try! You won’t be disappointed.
Conclusion
So, there you have it! A simple, effective, and incredibly affordable way to create your own vinegar spray cleaner. We’ve walked you through the process, highlighting the benefits of ditching harsh chemicals for a natural, homemade solution. But why is this DIY trick a must-try? It boils down to several key factors: cost savings, environmental responsibility, and the peace of mind knowing exactly what you’re spraying around your home.
Think about it: those store-bought cleaners, while convenient, often come with a hefty price tag and a list of ingredients you can barely pronounce. Our vinegar spray cleaner, on the other hand, utilizes readily available white vinegar, a powerhouse of cleaning potential, and a few optional ingredients to customize the scent and boost its cleaning power. You’ll be amazed at how much money you save in the long run, especially if you’re a frequent cleaner.
Beyond the financial benefits, you’re also making a conscious choice to reduce your environmental impact. Commercial cleaners often contain harmful chemicals that can pollute waterways and contribute to indoor air pollution. By opting for a vinegar-based solution, you’re minimizing your exposure to these toxins and creating a healthier living environment for yourself and your family.
But the beauty of this DIY project lies in its versatility. While the basic recipe of vinegar and water is effective on its own, you can easily adapt it to suit your specific needs and preferences.
Here are a few suggestions and variations to get you started:
* **Citrus Infusion:** Add citrus peels (lemon, orange, grapefruit) to your vinegar for a few weeks before mixing your cleaner. This will impart a fresh, invigorating scent and enhance the cleaning power, thanks to the natural oils in the peels.
* **Herbal Boost:** Infuse your vinegar with herbs like lavender, rosemary, or thyme for a calming and aromatic cleaning experience. Simply add a handful of fresh or dried herbs to the vinegar and let it steep for a week or two.
* **Essential Oil Enhancement:** For a quick and easy scent boost, add a few drops of your favorite essential oils to your vinegar spray cleaner. Lemon, tea tree, eucalyptus, and lavender are all excellent choices for their antibacterial and antiviral properties.
* **Grease-Cutting Power:** For tougher grease stains, add a teaspoon of dish soap to your vinegar spray cleaner. Be sure to use a natural, biodegradable dish soap to maintain the eco-friendly aspect of the recipe.
* **Vinegar Strength Adjustment:** While a 1:1 ratio of vinegar to water works well for most surfaces, you can adjust the ratio depending on the task at hand. For heavily soiled areas, you can use a stronger vinegar solution (e.g., 2:1 vinegar to water). For delicate surfaces, you may want to dilute the vinegar further (e.g., 1:2 vinegar to water).
We encourage you to experiment with different variations and find what works best for you and your home. The possibilities are endless!
So, what are you waiting for? Gather your ingredients, grab a spray bottle, and give this DIY vinegar spray cleaner a try. We’re confident that you’ll be impressed with the results. Not only will you have a sparkling clean home, but you’ll also be saving money and reducing your environmental footprint.
We’d love to hear about your experience! Share your tips, variations, and before-and-after photos in the comments below. Let’s build a community of DIY cleaning enthusiasts and inspire others to embrace the power of natural cleaning solutions. Your feedback is invaluable and will help us refine and improve this recipe for everyone. Let us know what surfaces you’ve used it on, what scents you’ve tried, and any other helpful hints you’ve discovered along the way. Together, we can make our homes cleaner, greener, and healthier, one spray at a time.
Frequently Asked Questions (FAQ)
Is vinegar spray cleaner safe to use on all surfaces?
While vinegar is a versatile cleaner, it’s not suitable for all surfaces. Avoid using it on natural stone surfaces like marble, granite, and limestone, as the acidity can etch and damage them. It’s also best to avoid using vinegar on waxed wood, as it can strip the wax finish. Always test the cleaner on an inconspicuous area first to ensure it doesn’t cause any discoloration or damage. Surfaces like glass, stainless steel, tile, and sealed wood are generally safe for vinegar cleaning.
What kind of vinegar should I use for cleaning?
Plain white distilled vinegar is the best choice for cleaning. It’s inexpensive, readily available, and has a high acidity level, making it effective at killing bacteria and dissolving grime. Avoid using flavored vinegars, such as apple cider vinegar or balsamic vinegar, as they may contain sugars or other additives that can leave a sticky residue.
Will my house smell like vinegar after cleaning?
Yes, there will be a vinegar smell initially, but it dissipates quickly. The vinegar smell typically disappears within an hour or two, especially if you ventilate the area well. If you’re concerned about the smell, you can add essential oils to your vinegar spray cleaner to mask the odor. Citrus oils like lemon and orange are particularly effective at neutralizing the vinegar smell.
How long does vinegar spray cleaner last?
Vinegar spray cleaner has a long shelf life and can last for several months, if not longer. Because vinegar is a natural preservative, it inhibits the growth of bacteria and mold. However, if you add essential oils or other ingredients, the shelf life may be slightly shorter. It’s best to store your vinegar spray cleaner in a cool, dark place to prolong its effectiveness. If you notice any changes in color, odor, or consistency, it’s best to discard the cleaner and make a fresh batch.
Can I use vinegar spray cleaner to disinfect surfaces?
Vinegar is a good disinfectant, but it’s not as powerful as commercial disinfectants like bleach. Vinegar is effective at killing many common household bacteria and viruses, including E. coli and Salmonella. However, it may not be as effective against more resistant pathogens. If you’re looking for a stronger disinfectant, you can use a solution of bleach and water. However, be sure to follow the manufacturer’s instructions carefully and take precautions to avoid skin and eye irritation. For everyday cleaning and disinfecting, vinegar spray cleaner is a safe and effective option.
Can I use vinegar spray cleaner on my clothes?
Yes, vinegar can be used as a natural laundry booster and stain remover. Adding a cup of vinegar to your washing machine can help to brighten whites, remove odors, and soften fabrics. You can also use vinegar to pretreat stains by spraying it directly onto the stain and letting it sit for a few minutes before washing. Vinegar is particularly effective at removing stains caused by grass, mud, and sweat. However, avoid using vinegar on delicate fabrics like silk and wool, as it can damage them.
Is vinegar spray cleaner safe for pets and children?
Vinegar spray cleaner is generally safe for pets and children, as it doesn’t contain any harsh chemicals or toxins. However, it’s still important to keep the cleaner out of reach of children and pets to prevent accidental ingestion. If your pet or child ingests vinegar spray cleaner, it may cause mild stomach upset. In most cases, the symptoms will resolve on their own. However, if you’re concerned, you can contact your veterinarian or doctor for advice.
Can I mix vinegar with other cleaning products?
It’s generally not recommended to mix vinegar with other cleaning products, especially bleach. Mixing vinegar with bleach can create toxic chlorine gas, which can cause respiratory irritation and other health problems. It’s also best to avoid mixing vinegar with ammonia, as this can create toxic chloramine gas. When using vinegar for cleaning, it’s best to use it on its own or with other natural ingredients like baking soda, essential oils, and lemon juice.
How do I make a larger batch of vinegar spray cleaner?
To make a larger batch of vinegar spray cleaner, simply multiply the ingredients in the recipe by the desired amount. For example, if you want to make a gallon of vinegar spray cleaner, you would use 1/2 gallon of vinegar and 1/2 gallon of water. Be sure to store the cleaner in a clean, airtight container to prevent contamination.
What are some other uses for vinegar around the house?
Vinegar has a wide range of uses around the house, beyond just cleaning. It can be used to unclog drains, remove hard water stains, deodorize garbage disposals, and even kill weeds in your garden. Vinegar is a truly versatile and eco-friendly solution for many common household problems.

Leave a Comment